
Fluffy, squishy, and surprisingly easy to make, homemade marshmallows without corn syrup might just become your go-to magical treat!
Before you know it, you'll be whipping up batch after batch of your own marshmallow creations as a holiday treat or for summertime S'mores.
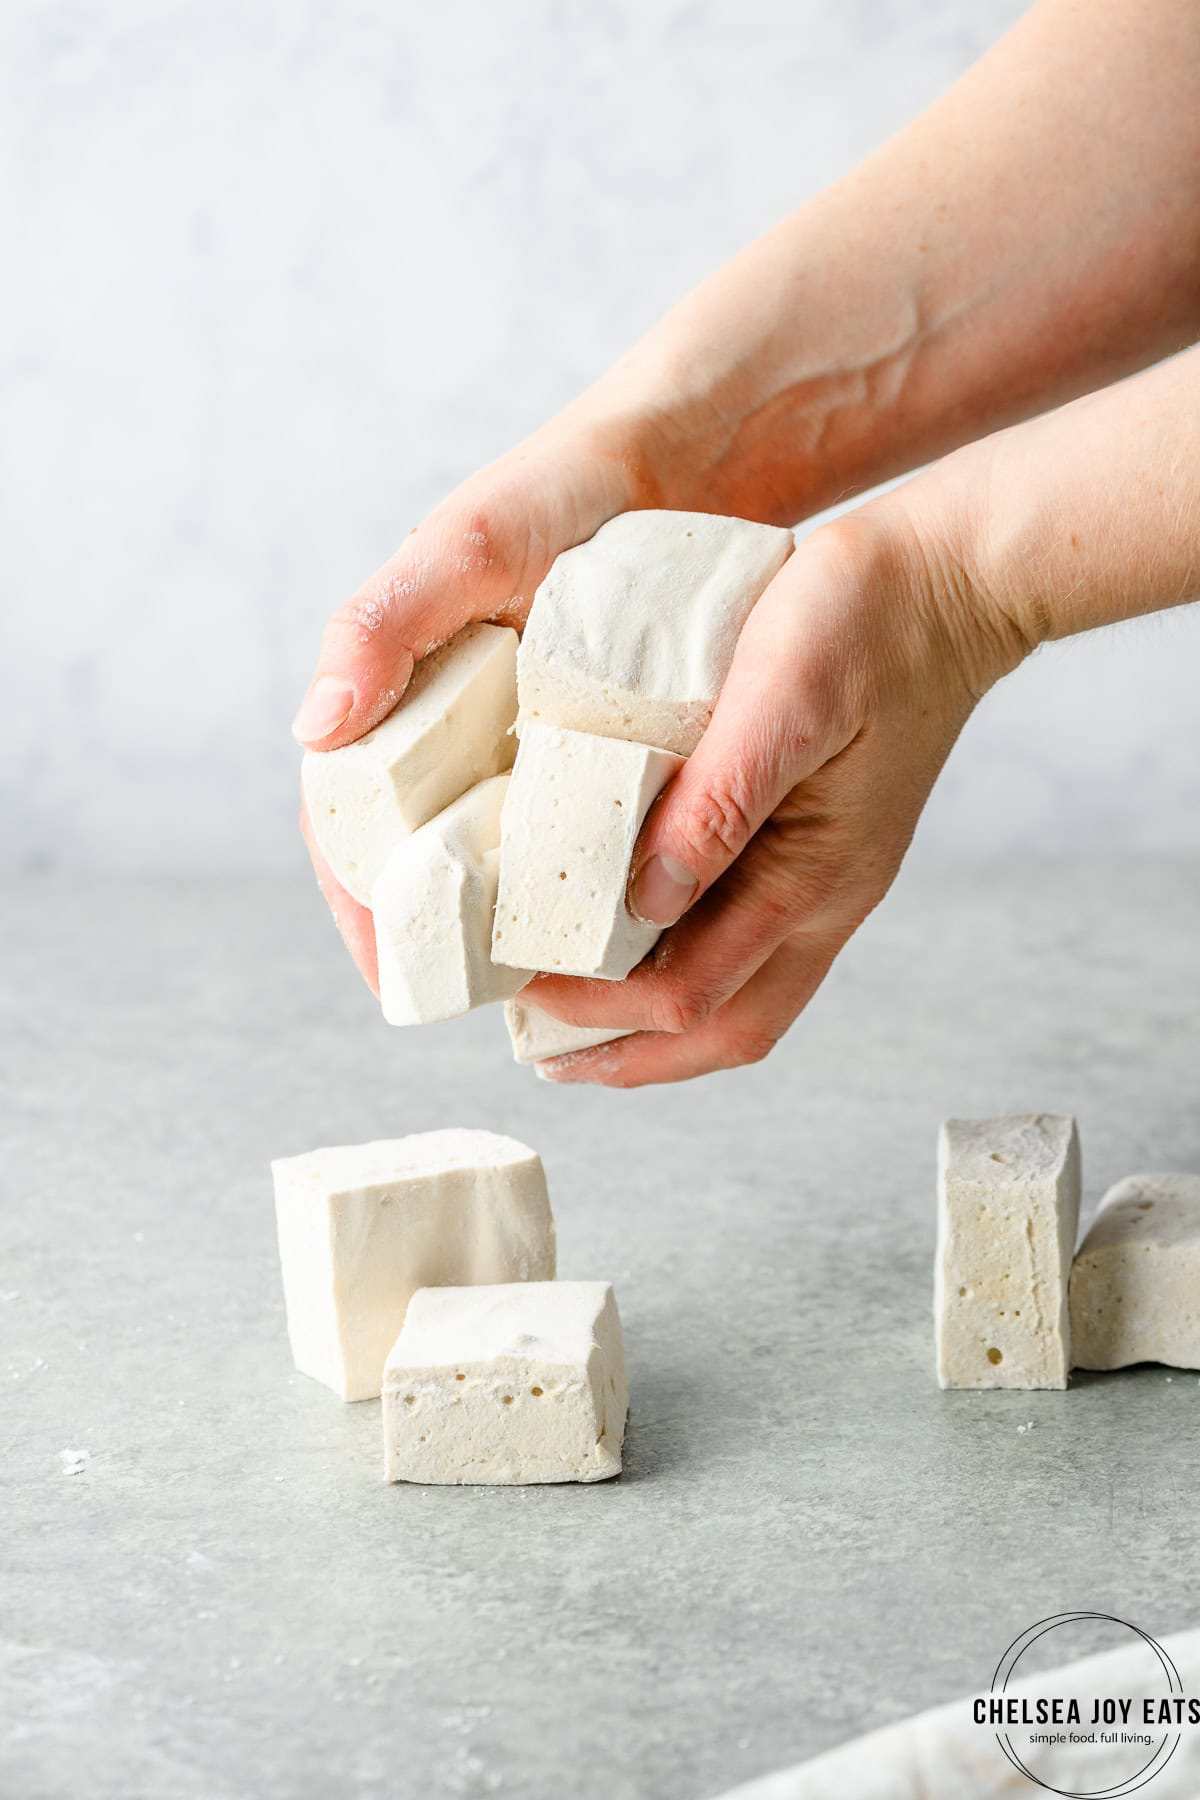
My hope in publishing this recipe is that you'll see how easy it is to make homemade marshmallows and create a new tradition out of it.
Making marshmallows is magic! And once you've mastered the originals, you can create innumerable flavors like Snickerdoodle, Gingerbread, chocolate, and more.
Jump to:
Ingredients needed for marshmallows without corn syrup
You'll likely be surprised to see just how few ingredients you need for homemade marshmallows.
Gelatin
The most important ingredient for homemade marshmallows! I use Vital Proteins gelatin.
Make sure your gelatin is JUST gelatin and has no other added ingredients, like sugars or flavoring.
At this time, I don't have a vegetarian/vegan alternative for this ingredient. The best marshmallows use gelatin.
Pure Maple Syrup
For my homemade marshmallows, I like using a blend of maple syrup and honey as a sweetener in place of corn syrup.
Pure maple syrup lends a warmer sweetness and depth of flavor that only honey doesn't provide. At least to me!
That said, you can omit the maple syrup and use only honey if you'd like.
Honey
I typically opt for raw honey, but feel free to use whatever honey you have on hand for this recipe!
If you don't have pure maple syrup on hand, you can make these homemade marshmallows with only honey as well. Just increase the amount of honey to make up for the maple syrup.
Arrowroot Powder or Cornstarch
Arrowroot powder or cornstarch helps keep the marshmallows from sticking to the parchment paper, pan, or themselves after they're cut.
It may be tempting to skip this because who wants a tasteless powder coating their marshmallows? But don't skip it!
I promise you won't taste it but it's absolutely crucial to prevent the marshmallows from sticking to everything.

Special equipment for making marshmallows at home
Candy thermometer
A candy thermometer removes any guesswork when making marshmallows.
When making marshmallows and other candies, you're cooking ingredients to a specific temperature to get a desired result as the mixture cools.
While you CAN make marshmallows without the thermometer if you pay very close attention, there's still a level of risk.
I made my first couple batches of marshmallows without a thermometer, just to see if it was something I'd want to make again (and therefore buy a candy thermometer for) - but I'll tell you, it's WAY easier with a candy thermometer.
No guessing, wondering if the honey/maple syrup mixture has boiled too long or not enough. The candy thermometer does the hard work, and you just get to watch the magic happen!
Deep pot or saucepan
As the syrup mixture boils, it'll bubble up. Make sure you're using a deep enough pot to prevent the syrup from bubbling over and coating everything!
If this is your first time making homemade marshmallows, pick the deepest pot you have that you can still affix the candy thermometer to.
For me, this is a high-sided 4 quart pot.
Stand mixer
Just like a candy thermometer, you can definitely make marshmallows at home without a stand mixer... but why?
It's FAR easier to get successful results with a stand mixer.
So, my instructions will use a stand mixer. Any stand mixer will do, so long as it's big enough for your batch size!

How to make homemade marshmallows
Marshmallows are surprisingly easy to make at home, but you'll have to pay close attention to the steps. Timing is everything with homemade marshmallows.
Gather equipment and ingredients
First thing's first - make sure you gather and prepare all the ingredients and equipment you need.
Timing is very important for homemade candies, and marshmallows are no different.
The stand mixer has to be ready to go when the syrup reaches the right temperature. The pan you're pouring the marshmallows into should also be prepared before starting anything.
Combine gelatin and water
Add some of the water to the bowl of a stand mixer and sprinkle gelatin overtop.
This allows the gelatin to "bloom", shorthand for hydrating and softening the dry gelatin so it becomes pliable and blends smoothly.
Blooming the gelatin is crucial for a smooth texture for the marshmallows, so don't be tempted to skip this step!
If you're flavoring the marshmallows, this is likely when you'll add that flavoring, mixing spices/powders/etc. with the water before sprinkling with gelatin.
Make the syrup
In a deep pot on the stovetop, combine the maple syrup, honey, and remaining water. Bring this mixture to a boil and use a candy thermometer to keep track of the temperature.
Be sure the tip of the thermometer isn't touching the bottom of the pot - it'll falsely read too hot.
It's ready when it gets to 240 degrees F - that's the magic number!
Pour syrup into bloomed gelatin and blend
With the stand mixer on low, carefully pour the hot syrup into the bloomed gelatin.
Take care to avoid the beater so you don't end up splattering hot syrup all over.
NOW here's the fun part! Turn the mixer up to high, beat for 5-7 minutes (set a timer or you're likely to underestimate), and watch in awe as the mixture turns from dark liquidy syrup to light, fluffy marshmallow cream.
It's honestly super cool to watch, and I love the reaction on other peoples' faces when they see it the first time.
You'll know the marshmallow cream is ready when you stop the mixer, lift up the beaters, and the marshmallow slowly drips from the beaters and gradually melts back into the marshmallow in the bowl.
Transfer to pan to set
Immediately pour the marshmallow cream into your prepared pan to set, scraping the mixing bowl with a spatula to get every scrap of marshmallow goodness.
Smooth out the top of the marshmallow cream as best you can.
Then, you'll wait for 4 hours or up to overnight before cutting the marshmallows.
Cut and enjoy!
Once set for at least 4 hours, they can be cut.
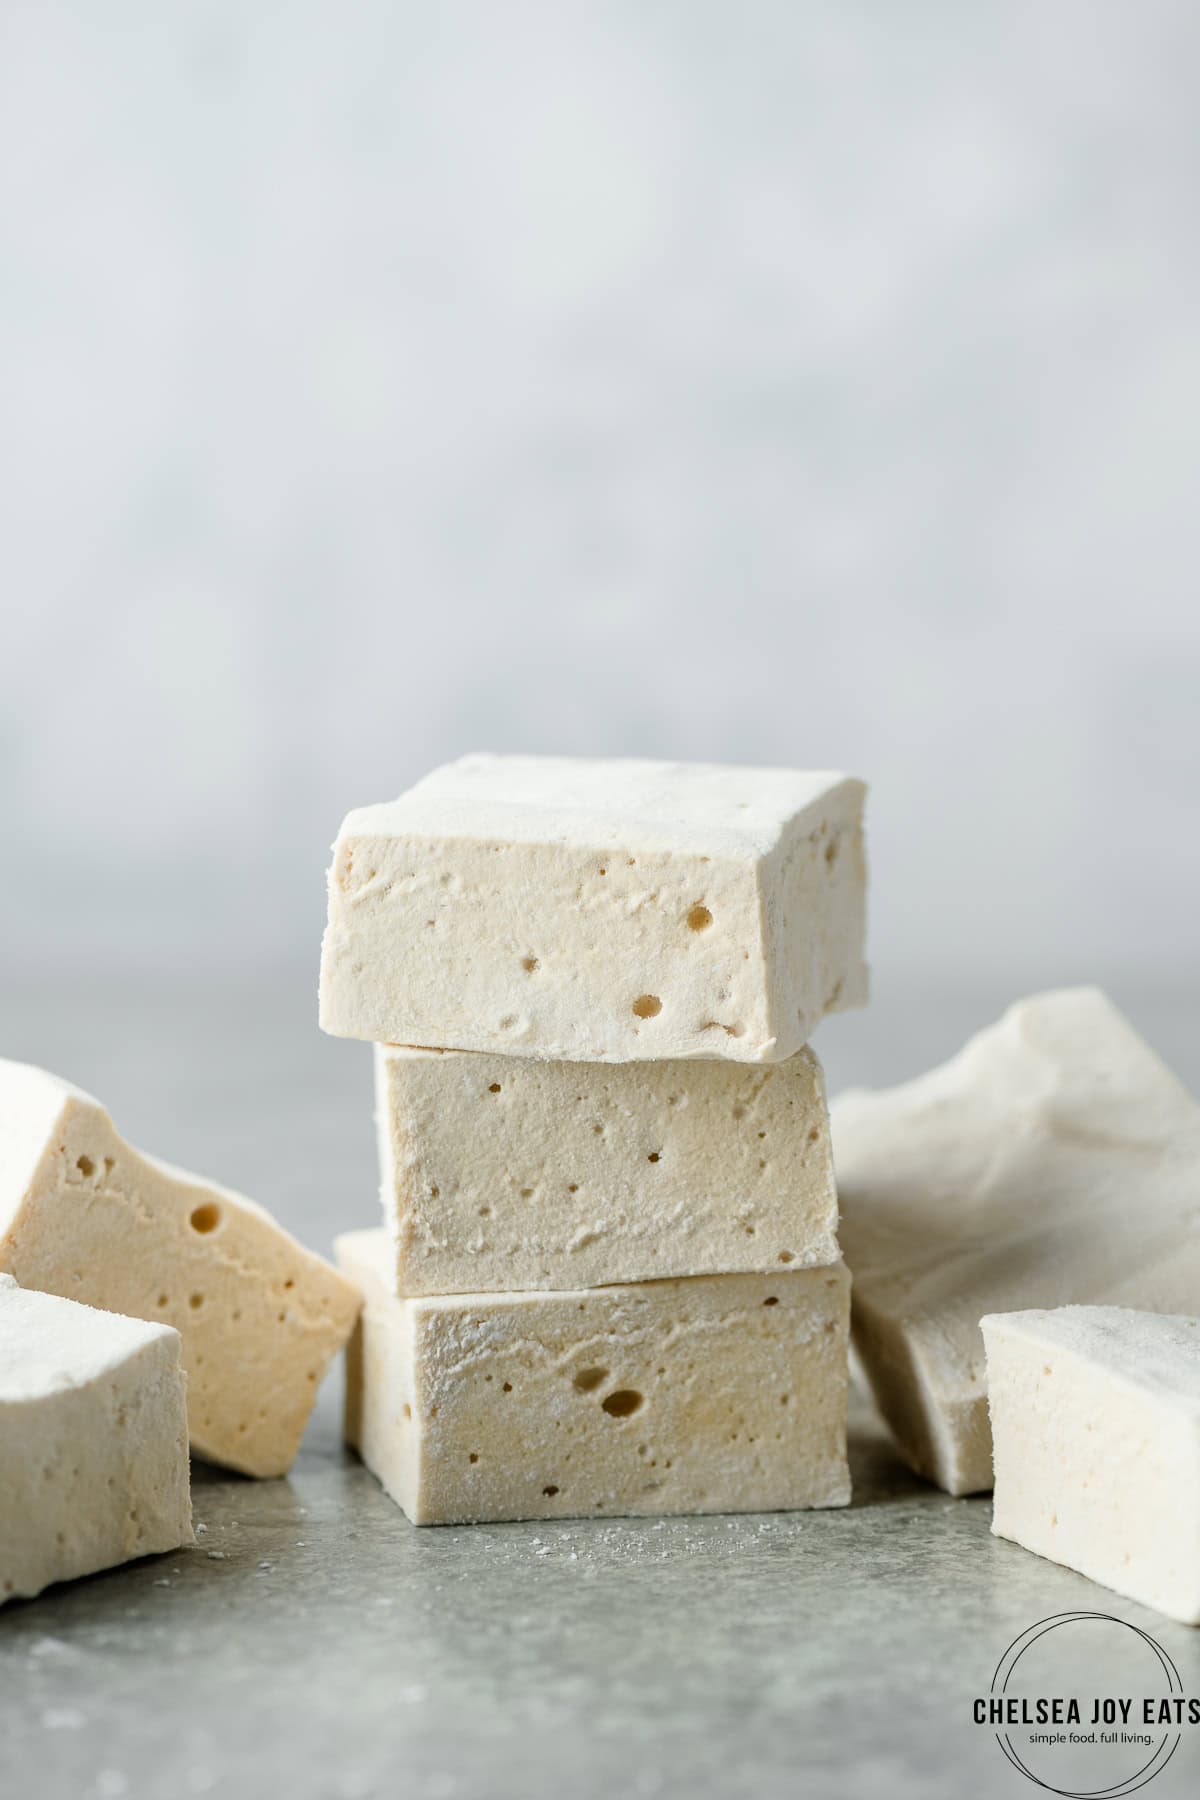
Sprinkle the top of the marshmallow slab with arrowroot flour or cornstarch, then cut with a sharp knife OR using cookie cutters to make fun shapes.
Toss the cut marshmallows in more arrowroot/cornstarch so they don't stick to everything (including fingers), and share or enjoy!
Leftover marshmallows can be stored in an airtight container for up to 3 days, but I find they're best within 24 hours of making them. That goes for most desserts, though, right?

Ideas for decorating marshmallows
If you'd like to further spritz up the marshmallows, consider some of these ideas!
- Top with sprinkles after pouring into the pan to set
- Mix a teaspoon to a tablespoon (to taste) of cocoa powder, cinnamon, or your favorite spice blend with the dusting powder
- Dip or drizzle the cut marshmallows in chocolate (similar to what I did for Gluten Free S'mores Bars!)
FAQs and tips
Two issues could be at play here:
You didn't bring the syrup up to the correct temperature.
OR
You didn't blend in the stand mixer long enough.
Both should be fairly simple to amend the next time you make marshmallows.
Make sure you invest in the candy thermometer if you haven't already. And be careful not to let the thermometer touch the bottom or sides of the pot (which will be hotter than the syrup itself, leading to an incorrect reading).
When blending in the stand mixer, set a timer! Seriously, 5 minutes doesn't seem like THAT long until you stand around for 5 minutes.
Set that timer and make sure the marshmallow cream doesn't drizzle off the beater, and instead slowly plops back in.
Don't throw out the unset marshmallows - you've essentially made marshmallow cream and can use it as a dessert topping (ice cream, brownies, or pots de creme, anyone?) or can stir it into hot chocolate, coffee, or oatmeal.
Yes, feel free! I prefer using a blend and I craft all my marshmallow recipes that way, but use what you have on hand and experiment with a ratio you like.
Easy - with a sharp chef's knife! If the marshmallow is sticking, dust with arrowroot flour or cornstarch.
For fun shapes as opposed to diamonds or cubes, you can use sharp cookie cutters dusted with arrowroot or cornstarch.
Marshmallow Christmas trees? Yes please!
Once cut and tossed in arrowroot flour or cornstarch, you can store homemade marshmallows in an airtight container or zip-top bag at room temperature.
If you're gifting marshmallows for the holidays, consider using non-plastic-based packaging like pastry boxes or bags.
Otherwise, Green Paper Products has clear, compostable packaging that would work great for marshmallows!
More homemade marshmallow recipes and ideas:


Did you try this recipe? I'd love to hear what you think! Comment below or tag me on Instagram.
Print📖 Recipe

Homemade Marshmallows without Corn Syrup
- Prep Time: 5 minutes
- Cook Time: 17 minutes
- Total Time: 22 minutes
- Yield: 16 marshmallows 1x
- Category: Dessert
- Method: blended
- Diet: Gluten Free
Description
Squishy, fluffy, and sweet, homemade marshmallows make a wonderful kitchne project! Watch the magic of the dark syrup transform into fluffy white marshmallows. This recipe uses a blend of honey and maple syrup, no corn syrup. You can use all honey or all maple syrup if you prefer.
Ingredients
- ¼ cup cornstarch or arrowroot powder, divided, for dusting
- 1 cup water, divided
- 2 ½ tablespoons plain gelatin (I use Vital Proteins)
- ½ cup honey
- ¾ cup pure maple syrup
- ¼ teaspoon sea salt
- 2 teaspoons vanilla extract
Instructions
- Prep a 9x9 square baking pan by lining it with parchment paper. Sprinkle 2 tablespoons cornstarch or arrowroot powder on the bottom of the parchment paper in an even layer. Don't skip this - the marshmallows will stick to parchment paper and won't release uniformly without some type of starch or flour on the bottom.
- Pour ½ cup of water into the bowl of a stand mixer. Sprinkle the gelatin overtop and set aside to allow the gelatin to bloom.
- In a large pot or saucepan, combine the remaining ½ cup water, honey, maple syrup, and sea salt. Attach a candy thermometer to the pot with the tip of the thermometer immersed in the liquid but not touching the bottom of the pot. Bring the mixture to a boil over medium-high heat. Continue to boil until the temperature on the candy thermometer reaches 240 degrees F. This takes about 10 minutes. Keep a watchful eye on the pot, as the syrup tends to foam and bubble up.
- As soon as the thermometer reads 240 degrees F, remove the pot from heat. Turn the stand mixer on low and carefully pour the syrup into the bowl. Avoid pouring directly onto the beaters, as that will cause splatters. Once you pour the syrup in, turn the mixer up to high speed. Beat for 5-7 minutes as the mixture increases in volume and lightens in color. You'll know the marshmallow cream is ready when you stop the mixer, lift up the beaters, and the marshmallow slowly drips from the beaters and gradually melts back into the marshmallow in the bowl. Add the vanilla extract, scrape down the sides of the bowl, and beat until just combined.
- Working quickly, pour the marshmallow cream into the prepared baking pan. Use a rubber spatula to smooth out the top of the marshmallows. Cover the pan with a lid or plastic wrap and let set at room temperature for at least 4 hours or overnight. When ready to cut, sprinkle the top with remaining arrowroot powder before slicing into cubes. Toss in the excess arrowroot flour to prevent sticking.
Notes
If preferred, you can use all honey or all maple syrup to make the marshmallows.
Leave a Reply